Honey cake…
While living in Latvia, I often overlooked honey cake (medus kūka) as I preferred other pastries. Then this cake became more popular in Australia, but the version I could buy in a fancy cake stall (and the dollars it cost) was nowhere near as good as the most basic slice you could get in Rīga. This prompted me to bake my own honey cake, and it turned out to be a crowdpleaser!
After a trial and error of different honey cake recipes, I have finally found a version that is relatively easy, quick and mess-free. Based on my explorations, there are two types of honey cake recipes – one calls for a thick batter (trust me, it is extremely sticky and almost unworkable), the other calls for a dough. I’ve baked both, both taste the same at the end, so I’m sticking with the dough recipe.
The beauty of the dough approach is that you can choose the shape of your cake as the layers are cut to the shape after they are baked. You could have a regular circle shape or a more traditional rectangle; you could have it heart-shaped, Latvia shaped, cat-shaped, you name it.
Make sure you taste the honey before you use it in the cake – the dough will taste strongly of the honey you choose, so pick a flavour you like.
The cream you choose will also make a big difference – I’ve found that the sour cream I can get in Australia is nowhere near as thick as the sour cream in Latvia. To make up for the difference and avoid overly liquid filling, I add cream cheese to the sour cream, which does not affect the flavour, but improves the texture.
As baking honey cake for the first time may be a bit intimidating, here’s the step-by-step of the honey cake:
- Combine eggs, butter, honey, sugar, a pinch of salt and bicarb soda in a medium-sized bowl. Beat together with a mixer.
2. Pour boiling water into a saucepan and put the bowl with egg mixture on the saucepan, creating a double boiler. Keep the water simmering. Mix the egg mixture for a few minutes until it starts to foam and expands. Remove the bowl from the water and mix in one cup of flour. Return the bowl to the saucepan and heat the bowl for a few minutes. Remove the bowl from the saucepan and add another cup of flour. Mix well and return the bowl to the saucepan and heat for further 3 minutes. Remove the bowl from heat.
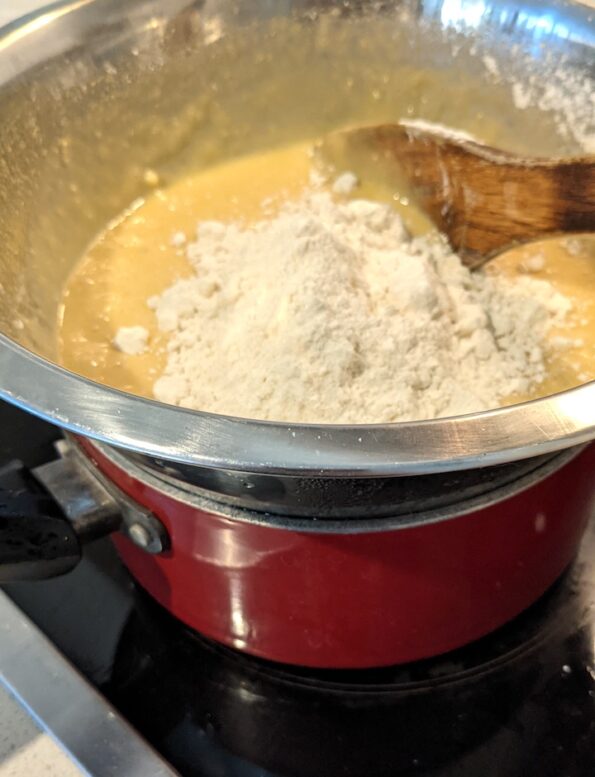
3. Place the third cup of flour on the working surface and pour the batter into the flour. Incorporate flour until a ball of dough forms – the dough should not be sticky. You may not use all flour, you may need extra.
4. Cut the dough in equal quantities in as many layers as you would like your cake to have. The quantity is enough for 6 layers of cake with 19cm (7.5 inches) diameter, and each ball of dough will be around 110g (just under 4 ounces).
5. Roll the dough very thinly on a sheet of baking paper or a silicone baking mat. You have to aim for the size of the final cake – my fairly irregular circle was around 20-22cm across. Prick the dough with a fork. Bake in a moderately hot oven for 8-10 minutes until it puffs up and becomes golden brown.

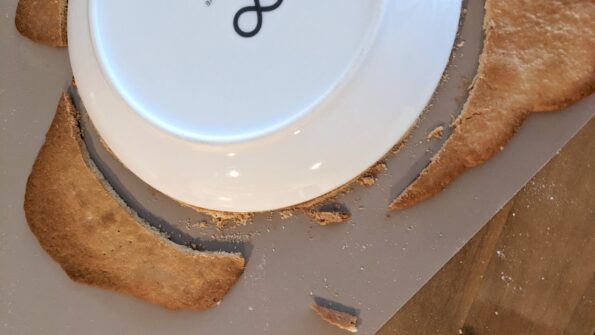
6. Take the cooked layer out of the oven, place it on a working surface and let it cool for a minute. Place a template (I used a side plate) on top of the cake layer and cut around it. Now let the layer cool completely. Preserve the cut off pieces – they can be used for decoration or even their own dessert.
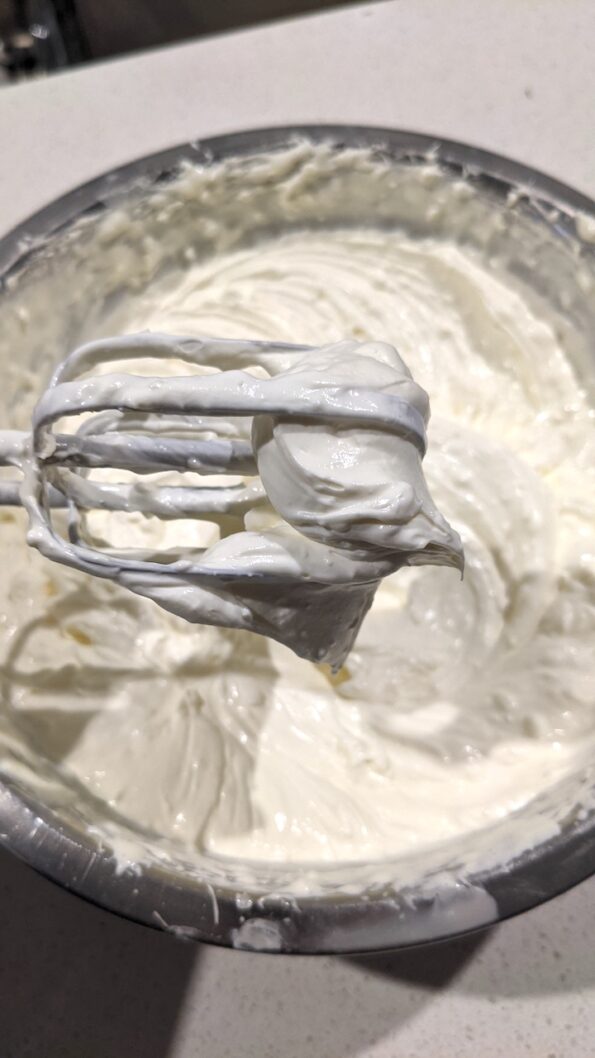
7. To make the cream, place the sour cream, cream cheese and sugar in a medium mixing bowl and whip on high for a few minutes until the cream firms up and stays on the beater. If you are using runny sour cream, you may need to strain it beforehand. To strain the sour cream, place it in a large sieve over a large bowl and place the bowl in a fridge for 8 to 12 hours. Discard the liquid that may collect in the bowl.
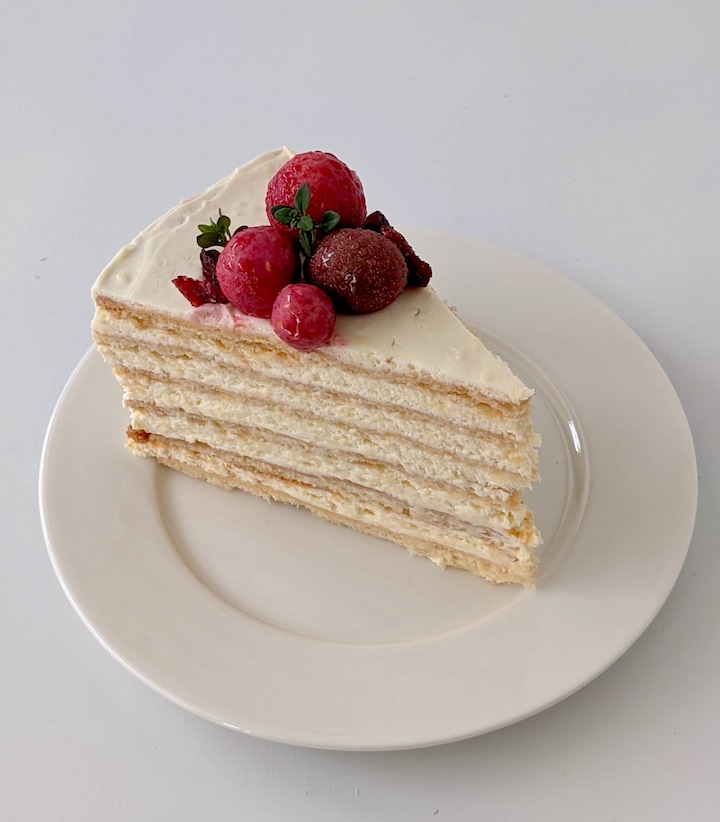
8. To assemble the cake, place a layer of cake on a serving plate, cover it with 1/7 of the cream and spread it across the layer. Place the next layer on top, cover with cream. When you get to the top of the cake, cover both the top and the sides of the cake with cream. You will need to work quickly as the cream will start to melt a bit, become liquid and harder to work with. To avoid this, place half of the filling in the fridge while you are building your cake.
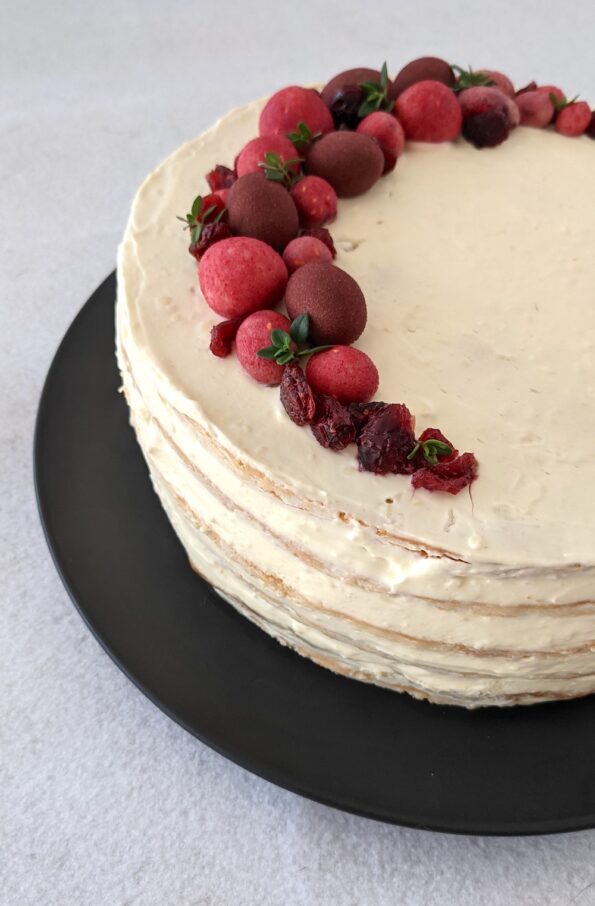
9. Decorate the cake. Traditionally, sides of the cake are covered with leftover crumbs (just roughly blitz your offcuts in a food processor), however, I prefer a naked cake look. My cake was decorated with freeze-dried raspberries covered in yoghurt, almonds in chocolate and raspberry dust, dried cranberries and lemon thyme. I found that the sourness of raspberry goes really well with the sweetness of the cake. Go to your local loose produce store and see what looks good!
10. Place the cake in a cake carrier or cover with a large bowl and place it into the fridge for 24 hours – cake layers need time to absorb the cream.

Latvian Honey Cake
Ingredients
- 2 ea large eggs
- 60 g butter (3 tbsp)
- 3 tbsp honey
- 3/4 cups sugar
- 2 tsp bi-carb soda
- 1 pinch salt
- 3 cups flour
- 800 g thick sour cream
- 200 g cream cheese
- 1 cup sugar
Notes
- Preheat the oven to 190C or 375F.
- Combine eggs, butter, honey, sugar, a pinch of salt and bicarb soda in a medium-sized bowl. Beat together with a mixer.
- Pour boiling water into a saucepan and put the bowl with egg mixture on the saucepan, creating a double boiler. Keep the water simmering. Mix the egg mixture for a few minutes until it starts to foam and expands. Remove the bowl from the water and mix in one cup of flour. Return the bowl to the saucepan and heat the bowl for a few minutes. Remove the bowl from the saucepan and add another cup of flour. Mix well and return the bowl to the saucepan and heat for further 3 minutes. Remove the bowl from heat.
- Place the third cup of flour on the working surface and pour the batter into the flour. Incorporate flour until a ball of dough forms - the dough should not be sticky. You may not use all flour, you may need extra.
- Cut the dough in equal quantities in as many layers as you would like your cake to have. The quantity is enough for 6 layers of cake with 19cm (7.5 inches) diameter, and each ball of dough will be around 110g (just under 4 ounces).
- Roll the dough very thinly - 2-3mm - on a sheet of baking paper or a silicone baking mat. Prick the dough with a fork.
- Bake for 8-10 minutes until the dough puffs up and becomes golden brown.
- Take the cooked layer out of the oven, place it on a working surface and let it cool for a minute. Place a template (I used a side plate) on top of the cake layer and cut around it. Now let the layer cool completely.
- To make the cream, place the sour cream, cream cheese and sugar in a medium mixing bowl and whip on high for a few minutes until the cream firms up and stays on the beater.
- To assemble the cake, place a layer of cake on a serving plate, cover it with 1/7 of the cream and spread it across the layer. Place the next layer on top, cover with cream. When you get to the top of the cake, cover both the top and the sides of the cake with cream. You will need to work quickly as the cream will start to melt a bit, become liquid and harder to work with. To avoid this, place half of the filling in the fridge while you are building your cake.
- Decorate the cake.
- Place the cake in a cake carrier or cover with a large bowl and put it in the fridge for 24 hours. The layers need time to absorb the cream.
- Cut and serve!





June 9, 2023
I picked Latvia in a bake club challenge, after a bit of of time on Google I found this recipe for honey cake that I liked the look of. Although a bit fiddly to make it tasted delicious and won!! Thanks for sharing the recipe
June 28, 2024
Question: you have butter in the ingredient list but not in the recipe— where should it go? Thank you!
February 7, 2025
2nd point of the recipe says butter.
March 25, 2025
Yum! I’m not a confident baker but I tried your recipe and it turned out so well that I’ve had requests from multiple friends to make it again! It was especially nice after a day or two, at room temperature. Thanks for sharing, from a baltic neighbour Lithuanian :)